Материал: surgical knot tying manual covidien
X.instrument-tie technique — square knot (1=1) formation of the first throw (cont’d)
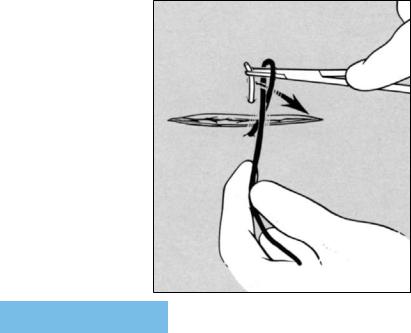
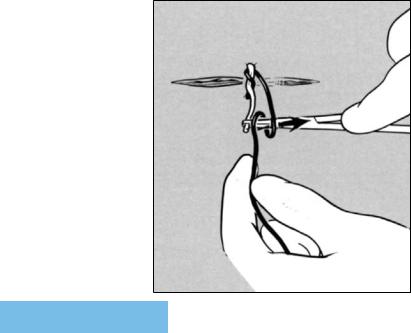
Step 3.
Clamp Free Suture End And Withdraw it Through the Suture Loop to Form the First, Single-Wrap Throw
The tips of the needle holder jaws grasp the suture end and withdraw (arrow) it through the first suture loop. The resulting first throw will have a figure “8” shape.
82
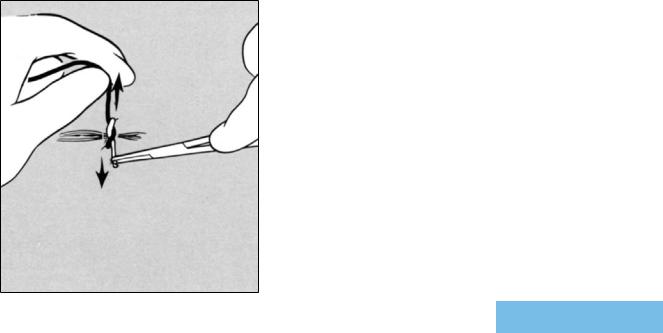
Step 4.
Advance the First Single-Wrap Throw to Wound Surface
The figure “8” shape throw will be converted into a rectangular-shaped throw by reversing the direction of the hand movement. The left hand moves away from the surgeon, while the needle holder held in the right hand advances toward the surgeon. This singlewrap throw is advanced to the wound surface by applying tension in a direction (arrows) that is perpendicular to that of the wound. Once the first throw of the square knot contacts the skin, the edges of the mid-portion of the wound are approximated.
83
X.instrument-tie technique — square knot (1=1) formation of the second throw
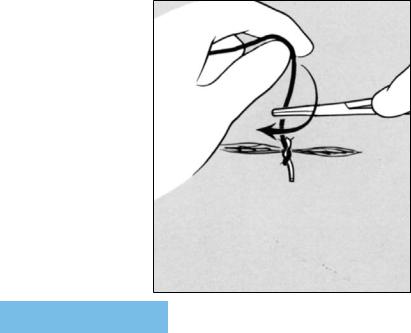
Step 5.
Position the Needle Holder
The needle holder releases the free suture end. The right hand holding the needle holder moves away from the surgeon to be positioned perpendicular to and above the fixed suture end. A second throw will be formed by the left hand as it wraps the fixed suture end over and around (arrow) the needle holder jaws. If the surgeon were to place the needle holder beneath the fixed suture end, the ultimate knot construction would be a granny knot (1x1).
84
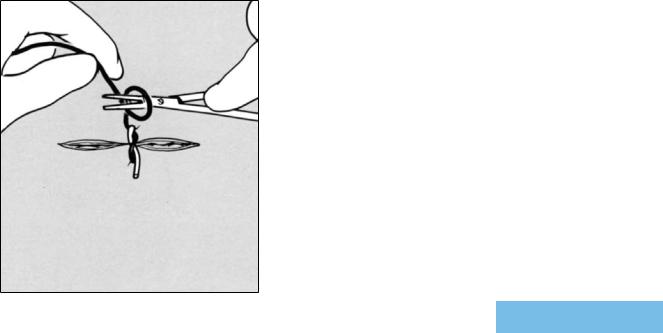
Step 6.
Form the Second Suture Loop
The fixed suture end held by the left hand is wrapped over and around the needle holder to form the second suture loop. With the suture wrapped around the needle holder jaws, the needle holder is moved
to grasp the free suture end, after which it is withdrawn through the suture loop.
85
X.instrument-tie technique — square knot (1=1) formation of the second throw (cont’d)
Step 7.
Clamp Suture End and Withdraw it Through the Suture Loop to Form the Second, Single-Wrap Throw
The tips of the needle holder jaws grasp the free suture end and withdraw (arrow) it through the second suture loop. By
withdrawing the free suture end through the loop, a rectangular-shaped second throw is formed. The surgeon will apply tension to the suture ends in a direction perpendicular to that of the wound.
86