Материал: m912201e
|
Components of WAGO-I/O-PRO 32 • 89 |
|
Managing Projects |
|
|
Target Files |
*.trg (target files in binary format for all installed targets) |
|
*.txt (target files for the installed targets in text format, if |
|
available) |
Registry Entries |
Registry.reg (Entries for Automation Alliance, Gateway |
|
und SPS; the following subtrees will be packed: |
|
HKEY_LOCAL_MACHINE\SOFTWARE\WAGO-I/O- |
|
PRO 32 |
|
HKEY_LOCAL_MACHINE\SOFTWARE\AutomationAll |
|
iance" |
Bitmap Files |
*.bmp (bitmaps for project POUs and visualizations) |
Gateway Files |
Gateway.exe, GatewayDDE.exe, GClient.dll, |
|
GDrvBase.dll, GDrvStd.dll, GHandle.dll, GSymbol.dll, |
|
GUtil.dll, further DLLs in the gateway directory if |
|
available |
To add any other files to the zip, press the button Other Files. The dialog 'Other files' will open where you can set up a list of desired files.
x Dialog box for adding other files for the Archive ZIP
Press the button Add to open the standard dialog for opening a file, where you can browse for a file. Choose one and confirm with Open. The file will be added to the list in the 'Other files' dialog. Repeat this for each file you want to add. To delete entries from the list, press the button Remove. When the list of selected files is ok, close the dialog with OK.
To add a Readme file to the archive zip, press the button Comment. A text editor will open, where you can enter any text. If you close the dialog with OK, during creation of the zip file a readme.txt file will be added.
WAGO-I/O-SYSTEM 759 WAGO-I/O-PRO 32
90• Components of WAGO-I/O-PRO 32
Managing Projects
Additionally to the entered comments it will contain information about the build date and version of WAGO-I/O-PRO 32.
If all desired selections have been made, in the main dialog press
Save... to create and save the archive zip file: The standard dialog for saving a file will open and you can enter the path, where the zip should be stored. The zip file per default is named <projectname>.zip. Confirm with Save to start building it. During creation the current progress status is displayed and the subsequent steps are listed in the message window.
Mail… to create a temporary archive zip and to automatically generate an empty email which contains the zip as an attachment. This feature only works if the MAPI (Messaging Application Programming Interface) has been installed correctly on the system, otherwise an error message is generated. During setup of the email the progressing status is displayed and the steps of the action are listed in the message window. The temporary zip file will be removed automatically after the action has been finished.
Cancel to cancel the action; no zip file will be generated.
4.3.7'File' 'Print'
Shortcut: <Ctrl>+<P>
With this command the content of the active window is printed.
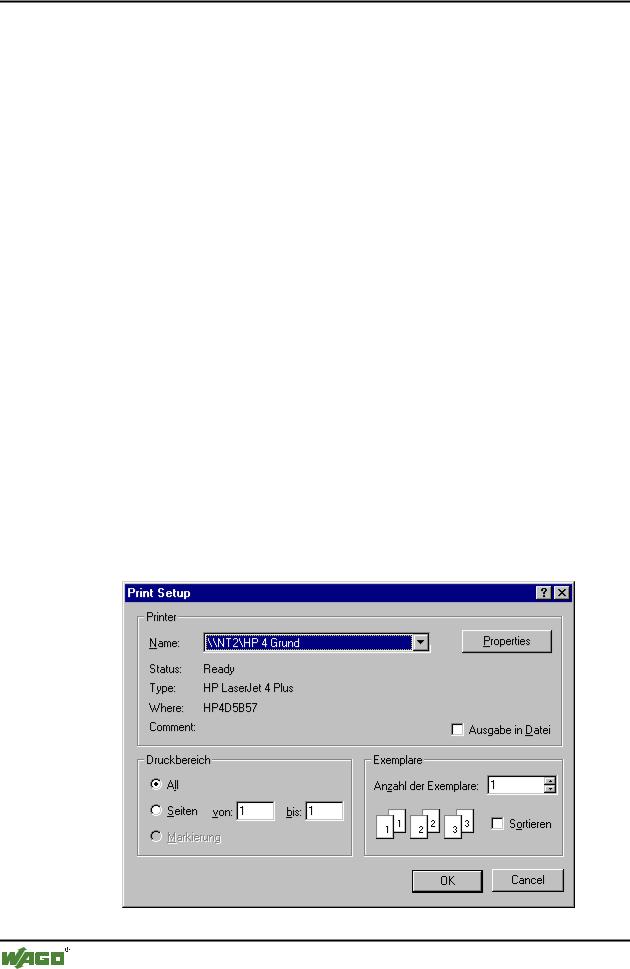
After the command has been chosen, then the Print dialog box appears. Choose the desired option or configure the printer and then click OK. The active window is printed. Color output is available from all editors.
x Print dialog box
WAGO-I/O-SYSTEM 759 WAGO-I/O-PRO 32
Components of WAGO-I/O-PRO 32 |
• 91 |
Managing Projects |
|
|
|
You can determine the number of the copies and print the version to a file.
With the button Properties you open the dialog box to set up the printer.
You can determine the layout of your printout with the command 'File' 'Printer Setup'.
During printing the dialog box shows you the number of pages already printed. When you close this dialog box, then the printing stops after the next page.
In order to document your entire project, use the command 'Project' 'Document'.
If you want to create a document frame for your project, in which you can store comments regarding all the variables used in the project, then open a global variables list and use the command 'Extras' 'Make docuframe file'.
4.3.8 'File' 'Printer setup'
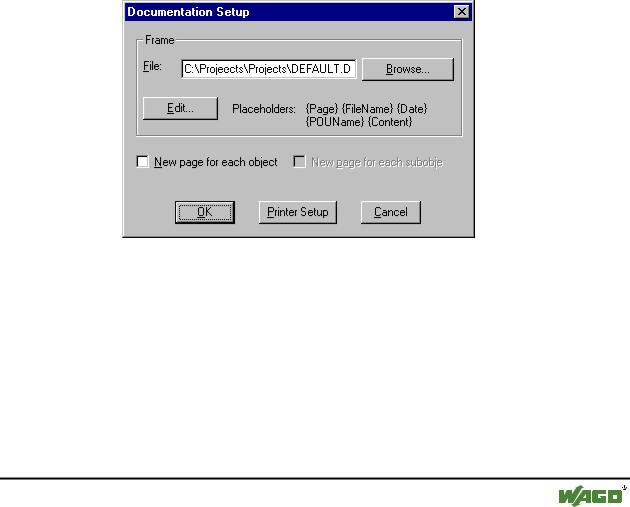
With this command you can determine the layout of the printed pages. The following dialog box is now opened:
x Page Layout Dialog Box
In the field File you can enter the name of the file with the extension ".dfr" in which the page layout should be saved. The default destination for the settings is the file DEFAULT.DFR.
If you would like to change an existing layout, then browse through the directory tree to find the desired file with the button Browse
You can also choose whether to begin a new page for each object and for each subobject. Use the Printer Setup button to open the printer configuration.
WAGO-I/O-SYSTEM 759 WAGO-I/O-PRO 32
92• Components of WAGO-I/O-PRO 32
Managing Projects
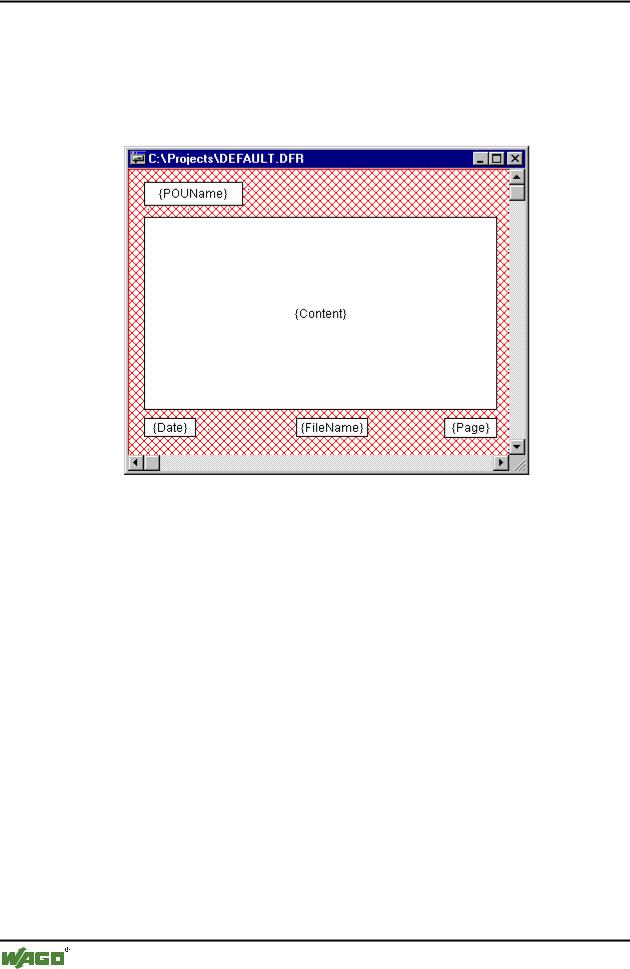
If you click on the Edit button, then the frame for setting up the page layout appears. Here you can determine the page numbers, date, filename and POU name, and also place graphics on the page and the text area in which the documentation should be printed.
x Window for pasting the placeholders on the page layout
With the menu item 'Insert' 'Placeholder' and subsequent selection among the five placeholders (Page, POU name, File name, Date, and Content), insert into the layout a so-called placeholder by dragging a rectangle1on the layout while pressing the left mouse button. In the printout they are replaced as follows:
Command |
Placeholder |
Effect |
Page |
{Page} |
Here the current page number appears in |
|
|
the printout. |
POU name |
{POU Name} |
Here the current name of the POU |
|
|
appears. |
File name |
{File Name} |
Here the name of the project appears. |
Date |
{Date} |
Here the current date appears. |
Contents |
{Contents} |
Here the contents of the POU appear. |
In addition, with 'Insert' 'Bitmap' you can insert a bitmap graphic (e.g. a company logo) in the page. After selecting the graphic, a rectangle should also
WAGO-I/O-SYSTEM 759 WAGO-I/O-PRO 32
Components of WAGO-I/O-PRO 32 |
• 93 |
Managing Projects |
|
|
|
be drawn here on the layout using the mouse. Other visualization elements can be inserted (see Visualizations).
If the template was changed, then window is closed if these changes
WAGO-I/O-PRO 32 asks when the should be saved or not.
4.3.9 'File' 'Exit'
Shortcut: <Alt>+<F4>
With this command you exit from WAGO-I/O-PRO 32.
If a project is opened, then it is closed as described in 'File' 'Save'.
4.3.10'Project' 'Build'
Shortcut: <F11>
The project is compiled using 'Project' 'Build'. The compilation process is basically incremental, that is only changed POUs are recompiled. A nonincremental compilation can also be obtained if the command 'Project' 'Clear all' is first executed.
For target systems that support Online Change, all POUs that will be loaded into the controller on the next download are marked with a blue arrow in the Object Organizer after compilation.
The compilation process that is carried out with 'Project' 'Build' occurs automatically if the controller is logged-in via 'Online' 'Log-in'.
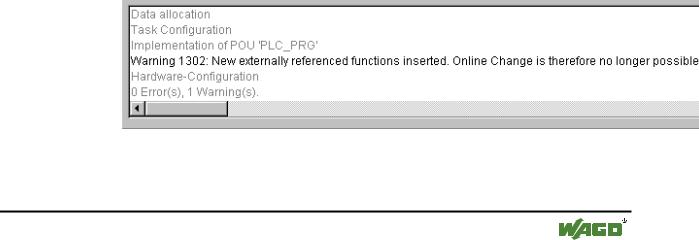
During compilation a message window is opened which shows the progress of the compilation process and any errors and warnings which may occur during compilation. Errors and warnings are marked with numbers. Using F1 you get more information about the currently selected error.
See chapter Error Messages and Warnings of the Online Help chapters for a listing of all available error messages and warnings.
x Message window of a project
If the option Save before compilation is selected in the options dialog of the Load & Save category, the project is stored before compilation.
WAGO-I/O-SYSTEM 759 WAGO-I/O-PRO 32