Материал: m912201e

244 • Library Manager
Standard Library
7.2 Standard Library
The library with "standard.lib" is always available. It contains all the functions and function blocks which are required from the IEC61131-3 as standard POUs for an IEC programming system. The difference between a standard function and an operator is that the operator is implicitly recognized by the programming system, while the standard POUs must be tied to the project (standard.lib).
The code for these POUs exists as a C-library and is a component of WAGO- I/O-PRO 32.
7.3 User-defined Libraries
If a project is to be compiled in its entity and without errors, then it can be saved in a library with the 'Save as' command in the 'File' menu. The project itself will remain unchanged. An additional file will be generated, which has the default extension ".lib". This library afterwards can be used and accessed like e.g. the standard library.
For the purpose to have available the POUs of a project in other projects, save the project as an Internal Library *.lib. This library afterwards can be inserted in other projects using the library manager.
If you have implemented POUs in other programming languages, e.g. C, and want to get them into a library, then save the project using data type External Library *.lib). You will get the library file but additonally a file with the extension "*.h". This file is structured like a C header file and contains the declarations of all POUs, data types and global variables, which are available with the library. If an external library is used in a project, then in simulation mode that implementation of the POUs will be executed, which was written with WAGO-I/O-PRO 32; but on the target the C-written implementation will be processed.
7.4 'Insert' 'Additional Library'
With this command you can attach an additional library to your project.
When the command is executed, the dialog box for opening a file appears. Choose the desired library with the "*.lib" extension and close the dialog with OK. The library is now listed in the library manager and you can use the objects in the library as user-defined objects.
7.5 Remove Library
With the 'Edit' 'Delete' command you can remove a library from a project and from the library manager.
WAGO-I/O-SYSTEM 759 WAGO-I/O-PRO 32

Visualization • 245
Visualization
8 Visualization
8.1 Visualization
Visualizations allow you to view your project variables. With the help of visualizations, you can draw geometrical elements offline which can then change e.g. their form or color online in response to specified values of variables. For example it is possible to display the increase in a variable value with a bar chart.
In Online mode, input to the program can then be carried out also via mouse and keyboard.
By using placeholders instead of concrete variables and text strings in configuring the visualization elements, a visualization object (visualization POU) can easily be used many time (referenced) by inserting it in other visualization objects and providing it there with various configuration (for example for visualizing different instances of a function block).
If a visualization object is to be inserted in another visualization, it is named 'Reference' and behaves in Online mode just like the original visualization, that is the corresponding elements of a reference from VisuA react simultaneously and identically to those from VisuA.
When a suitable translation file (see 'Project' 'Translate into other language') is available, visualization texts can be switched to another national language in Online mode.
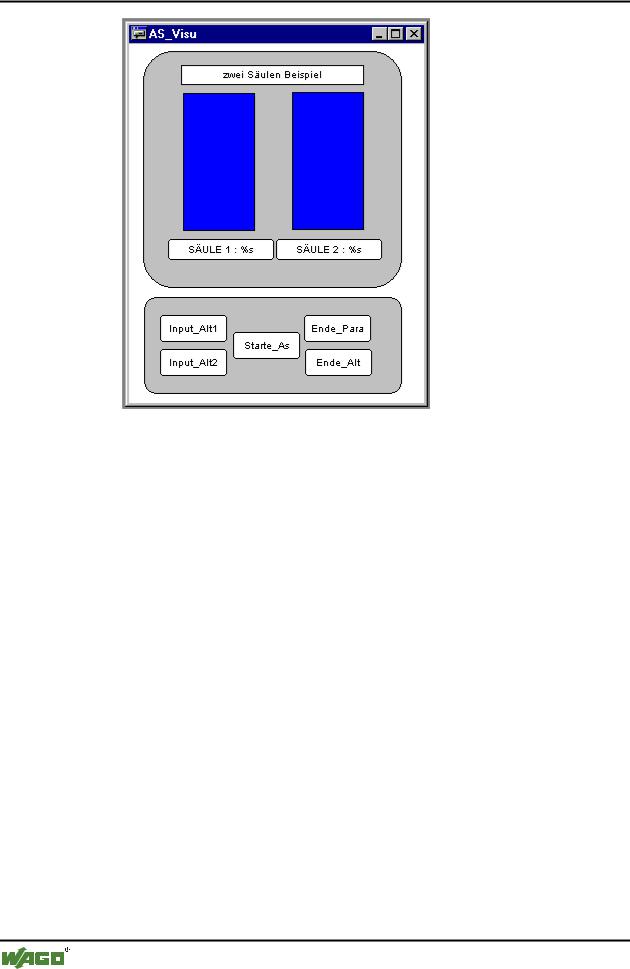
x Example of a Visualization
WAGO-I/O-SYSTEM 759 WAGO-I/O-PRO 32
246 • Visualization
Create Visualization
8.2 Create Visualization
In order to create a visualization, you must select the register card for 
Visualization in the Object OrganizerUsing the 'Project' 'Object Add' command, you can create a new visualization object. Open the 'New visualization' dialog, in which you can enter the name of the new visualization. Once a valid entry is made, that is not a name that is already in use and no special characters used, you can close the dialog with OK. A window opens, in which you can edit the new visualization.
8.2.1 Visualization Elements, Insert
8.2.1.1 Visualization Elements, Insert
You can insert four different geometric forms, as well as bitmaps, buttons and existing visualizations, into your visualization.
Geometric forms at your disposal include: rectangles, rounded rectangles, ellipses/circles, and polygons.
Go to the 'Insert' menu item and select freely from the following commands: 'Rectangle', 'Rounded Rectangle', 'Ellipse', 'Polygon', 'Line', 'Curve', 'Bitmap', 'Visualization' 'Button'. A check appears in front of the selected command.
You can also use the tool bar. The selected element appears pushed down).
If you now go to the editor window with the mouse, you will see that the mouse pointer is identified with the corresponding symbol. Click on the
WAGO-I/O-SYSTEM 759 WAGO-I/O-PRO 32

Visualization • 247
Create Visualization
desired starting point of your element and move the pointer with pressed left mouse key until the element has the desired dimensions.
If you want to create a polygon or a line, first click with the mouse on the position of the first corner of the polygon resp. on the starting point of the line, and then click on the further desired corner points. By doubleclicking on the last corner point you will close the polygon and it will be completely drawn respectively the line will be completed. If you want to create a curve (Bezier curves) determine the initial and two other points with mouse clicks to define the circumscribing rectangle. An arc is drawn after the third mouse click. You can then change the position of the end point of the arc by moving the mouse and can then end the process with a double click or add another arc with additional mouse clicks.
Furthermore pay attention, to the status bar and the change from select and insert modes.
8.2.1.2 'Insert' 'Rectangle'
With the command you can insert a rectangle as an element into your present visualization. (Use, see Visualization Elements, Insert)
8.2.1.3 'Insert' 'Rounded Rectangle'
With the command you can insert a rectangle with rounded corners as an element in your present visualization. (Use, see Visualization Elements, Insert).
8.2.1.4 'Insert' 'Ellipse'
With the command you can insert a circle or an ellipse as an element in your present visualization. (Use, see Visualization Elements, Insert).
8.2.1.5 'Insert' 'Polygon'
With the command you can insert a polygon as an element in your present visualization. (Use, see Visualization Elements, Insert).
8.2.1.6 'Insert' 'Line'
With the command you can insert a line as an element into your current visualization. (Use, see Visualization Elements, Insert).
8.2.1.7 'Insert' 'Curve'
With the command you can insert a Bezier curve as an element into your current visualization. (Use, see Visualization Elements, Insert).
WAGO-I/O-SYSTEM 759 WAGO-I/O-PRO 32

248 • Visualization
Create Visualization
8.2.1.8 'Insert' 'Bitmap'
With the command you can insert a bitmap as an element in your present visualization. (Use, see Visualization Elements, Insert).
While pressing the left mouse button, bring up an area in the desired size. The dialog box is opened for opening a file. Once you have selected the desired bitmap, it will be inserted into the area brought up.
8.2.1.9 'Insert' 'Visualization'
With the command you can insert an existing visualization as an element in your present visualization. (Use, see Visualization Elements, Insert).
While pressing the left mouse button, bring up an area in the desired size. A selection list of existing visualizations opens. After you have selected the desired visualization, it will be inserted in the defined area.
An inserted visualization will also be named as a reference.
8.2.1.10'Insert' 'Button'
This command is used to insert a button into your current visualization. (Use, see Visualization Elements, Insert).
Drag the element to the desired size with the left mouse button held down.
If a toggle variable is configured for the button it displays the state of this variable by visually displaying whether it is pressed or not pressed. Conversely, the variable is toggled by "pressing" the button.
8.2.2 Working with Visualization Elements
8.2.2.1 Selecting Visualization Elements
In order to select an element, click with the mouse on the element. You can also select the first element of the elements list by pressing the <Tab> key and jump to the next by each further keystroke. If you press the <Tab> key while pressing the <Shift> key, you jump backwards in the order of the elements list.In order to mark multiple elements, press and hold the <Shift> key and click the corresponding elements, one after another; or, while holding down the left mouse button, pull a window over the elements to be selected.
In order to select all the elements, use the 'Extras' 'Select All' command.
If you are in the element list (called by 'Extras' 'Element list'), you can select the concerned element in the visualization by selecting a line.
WAGO-I/O-SYSTEM 759 WAGO-I/O-PRO 32