Материал: m912201e
264 • Visualization
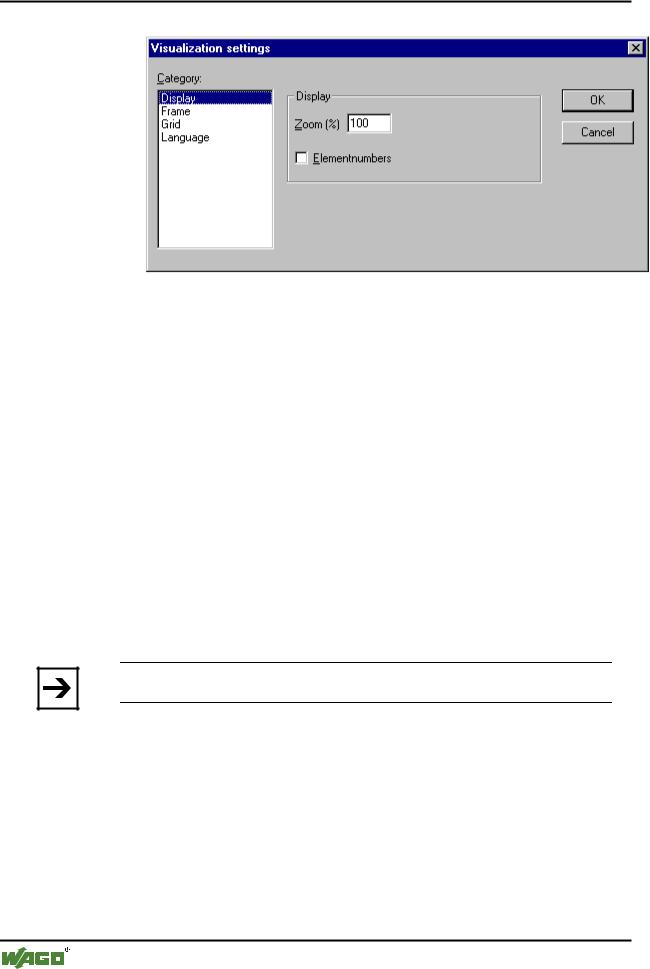
Create Visualization
Category Frame: If Auto-scrolling is selected, the visible portion of the visualization window will move automatically when you reach the edge while drawing or moving a visualization element. If Best fit in Online mode is selected, the entire visualization including all elements will be shown in the window in Online mode regardless of the size of the window. When Include Background Bitmap is selected, the background bitmap will be fitted into the window as well, otherwise only the elements will be considered.
Category Grid: Define here whether the grid points are visible in the offline mode, whereby the spacing between the visible points is at least 10 even if the entered size is smaller than that. In this case the grid points only appear with a spacing which is a multiple of the entered size. Selecting Active causes the elements to be placed on the snap grid points when they are drawn and moved. The spacing of the grid points is set in the field
Size.
Category Language : Here you can specify in which national language the text that you assigned to an element in the Text and Text for Tooltip options should be displayed.
For this, there must either be a *.tlt translation file for the project, or a *.vis language file created especially for the visualization.
Note:
The text display changes only in Online mode!
Regarding creating a translation file, please see 'Project' 'Translate into other languages'.Project..Translateintoanotherlanguage.>Proc.
For creating a special *.vis language file for the visualization, see below. This option is retained for reasons of compatibility with projects created under Version 2.1.
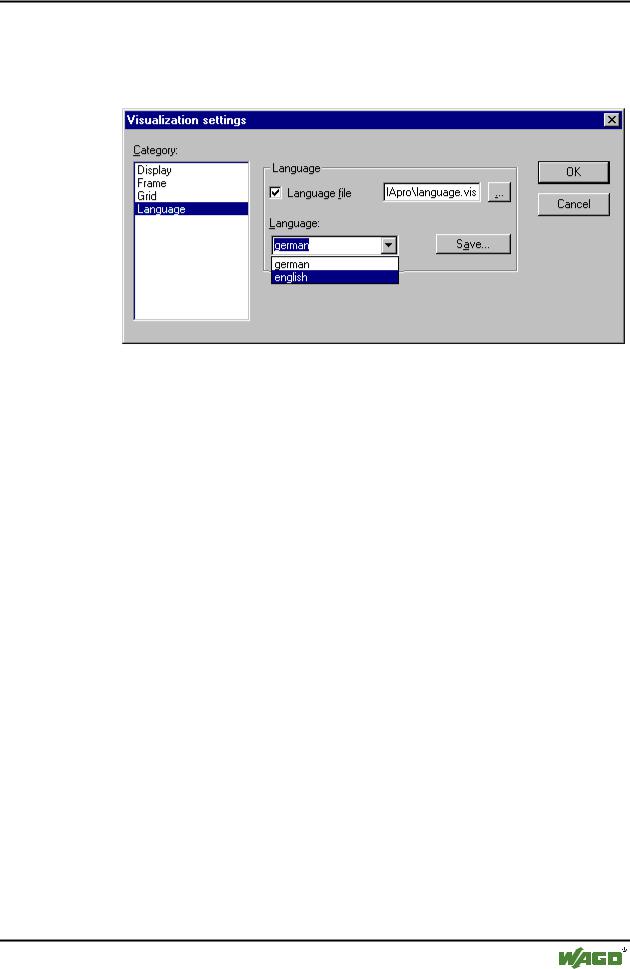
In order to select a translation or language file, activate the Language file option in the dialog and enter in the input field next to it the appropriate file
path, or obtain the help of the standard file opening dialog via the  button.
WAGO-I/O-SYSTEM 759 WAGO-I/O-PRO 32
Visualization • 265
Create Visualization
In the selection window under Language you can now select among the options German and English in the example shown here.
x Selection of a language file for a visualization
Creating a *.vis language file:
In order to set up a new *.vis language file for the visualization, proceed as follows:
Open likewise the Settings Visualization dialog, Language category.
Choose option language file. In the associate input field enter where you want to store the file. The extension is .vis. You also can use the dialog 'Open file'
by pressing the button  . If a language file with the extension .vis is already present, it will be offered to you here.
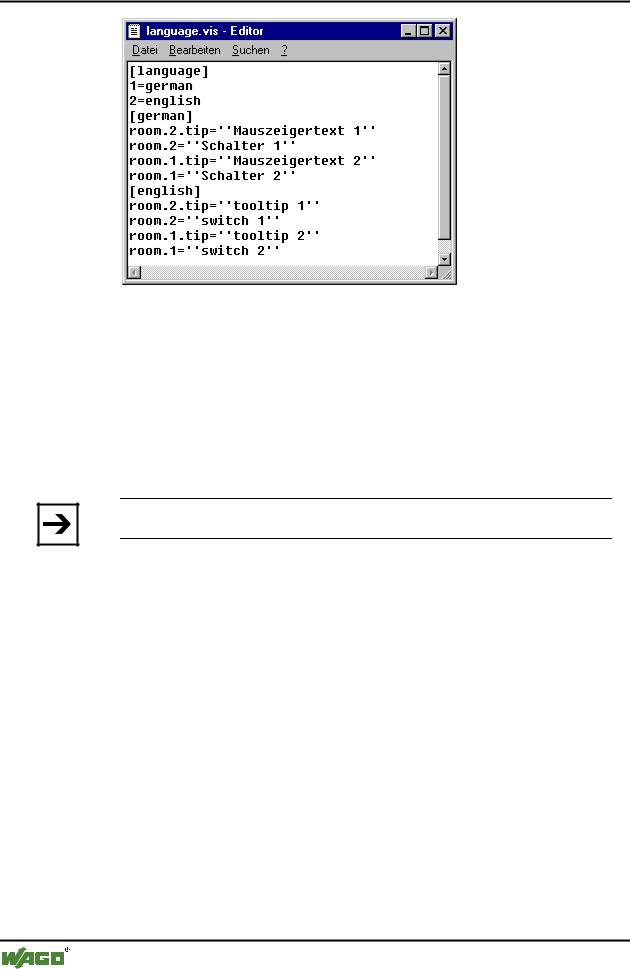
In the input field next to Language you fill in a keyword for the language which is currently used in the visualization, i.e."german" (or "D"). then press the button Save. A file with the extension .vis will be created, which now can be edited by a normal text editor. For example you can open the file by NOTEPAD:
x Example of a language file for a visualisation (Category Language)
WAGO-I/O-SYSTEM 759 WAGO-I/O-PRO 32
266 • Visualization
Create Visualization
You get a list of the text variables for the language currently used in the visualization. It includes a reference to the title of this list, for example "1=german" as reference to the title [german]. You can extend the list by copying all lines, then replacing the German by English text and setting a new title [english]. Beyond the line 1=german you accordingly have to add 2=english.
To view the visualization in one of the prepared languages, open the dialog Language again. In the option field beyond Language now you can choose between german and english (for the example described above).
Note:
The text display does not change before switching to Online Mode !
Calling up language-dependent Online Help via a visualization element:
The calling of a different Help file with a visualization element can be tied in with the language currently entered for the visualization. For this purpose, the command INTERN HELP must be entered for this element in the 'Configure element' dialog at the location 'Execute program', and a [Visu-Helpfiles] section must be present in the WAGO-I/O-PRO 32 .ini file. Below this, the corresponding help files must be assigned to the languages available for selection in the visualization: e.g.:
[Visu-Helpfiles]
German=C:\PROGRAMME\HELP_D.HLP
English=C:\PROGRAMME\HELP_E.HLP
8.2.4.10Operation over the keyboard - in online mode
The visualization elements can be manipulated in online mode over the following key functions:
WAGO-I/O-SYSTEM 759 WAGO-I/O-PRO 32
Visualization • 267
Create Visualization
Pressing the <Tabulator> key selects the first element in the element list for which an input is configured. Each subsequent pressing of the key moves one to the next element in the list. Pressing the key while keeping the <Shift> key depressed selects the previous element.
The arrow keys can be used to change from a selected element to a neighbouring one in any direction.
The <Space bar> is used to execute an activity on the selected visualization element. If the element is one which has a text output variable, a text input field will be opened which displays the text contents of the variable. Pressing the <Enter> key writes in this value.
The individual elements of references behave in Online mode identically to the corresponding ones in the visualization that is referenced. They will therefore react the same way as individual elements to inputs and operation by mouse and keyboard; the display of tooltips in references is also elementdependent. When processing the element list, as for instance when jumping from one input element to the next using the tabulator, the processing of all individual elements of a reference proceeds from the location of the reference in the element list before jumping to the next element of the list.
Note:
Operation over the keyboard in online mode is of greatest significance for the operation version of WAGO-I/O-PRO 32!
8.2.4.11'File' 'Print' in online mode
'File' 'Print'is used to print out the contents of the visualization window in online mode. Visualizations which stretch over the border of the window can lead to inconsistencies particularly when there are moving elements in the visualization.
8.2.4.12Visualizations in libraries
Visualizations can also be stored in libraries and thus be made available to projects as library POUs. They can be inserted as references like the visualizations directly present in the project, or they can be called up via the command "Zoom to vis." in the input configuration of another visualization.
Note:
Visualizations used in a project must have unique names. It can be problematic if for instance a visualization from a library is called or referenced which has the same name as one present in the project. Because, in processing references or visualization calls in the program, first the visualizations in the project, and only thereafter the ones in the loaded libraries will be implemented.
WAGO-I/O-SYSTEM 759 WAGO-I/O-PRO 32
268 • DDE Interface
DDE Communication with WAGO-I/O-PRO 32
9 DDE Interface
9.1 DDE Communication with WAGO-I/O-PRO 32
WAGO-I/O-PRO 32 has a DDE (dynamic data exchange) interface for reading data. WAGO-I/O-PRO 32 uses this interface to provide other applications that also use a DDE Interface with the contents of control variables and IEC addresses
If the GatewayDDEServer is used, which works with symbols, WAGO-I/O- PRO 32 is not needed to read variables values from the PLC and to transfer them to applications with an DDE interface.
Attention:
Direct addresses cannot be have to define variables in desired addresses (AT).
read over the DDE server ! For this case you WAGO-I/O-PRO 32 which are assigned to the
Attention:
The DDE interface has been tested with Word 97 and Excel 97 on Windows NT 4.0. If the DDE communication fails caused by a mismatch of other versions or additionally installed programs on a computer, WAGO Kontakttechnik GmbH cannot take any responsibility.
9.2DDE interface of the WAGO-I/O-PRO 32 programming system
9.2.1 Activating the DDE Interface
The DDE interface becomes active as soon as the PLC (or the simulation) is logged in.
9.2.2 General Approach to Data
A DDE inquiry can be divided into three parts:
1.Name of the program (here: WAGO-I/O-PRO 32),
2.File name and
3.Variable name to be read.
Name of the program: WAGO-I/O-PRO 32
File name:complete project path (c:\example\example.pro).
Variable name: The name of a variable as it appears in the Watch and Receipt Manager .
WAGO-I/O-SYSTEM 759 WAGO-I/O-PRO 32